Dashboard User Manual
Overview
The Dashboard Application is integrated with both the Registration process (at the Kiosk - by the Guest) and the Pre-Registration process (by the Host at time of invitation). It is primarily used by receptionists, who may be located at the same site as the kiosk or elsewhere. This cloud-based tool tracks:
- Guests with scheduled appointments
- Guests who have arrived
- Guests currently in the building
- Guests who have departed
The application also allows badge printing.
Access Requirements
To access the application, your public IP address must be whitelisted. Please visit https://teleportel.com/ip and email your IP address to: helpdesk@teleportel.com
Login Instructions
We recommend using your corporate ADFS for login, as it offers:
- Enhanced security
- Password management under your IT control
- Access to advanced features
If ADFS is not used initially, Teleportel can provide access via the SAML 2.0 protocol, which is more limited.
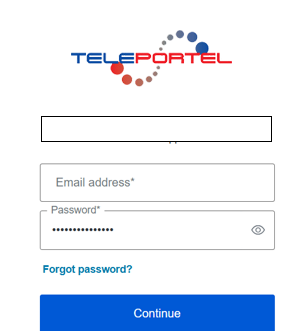
Use your dashboard credentials to log in.
Using the Dashboard
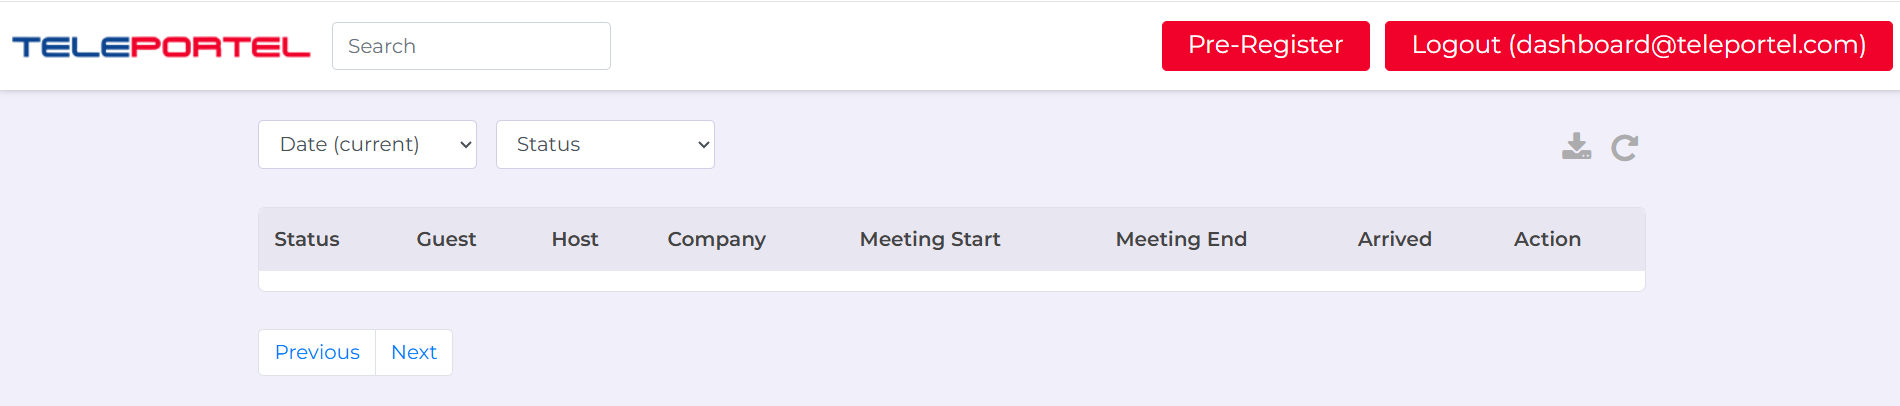
Command Button
Click the EXECUTE button (top right) to confirm and activate any selection. 
Search
Use the Search box to find specific information, such as a guest's name.  followed by
Guest Status
Use the Status dropdown to filter by guest status. This includes:
- Pre-registered
- Arrived
- In Building
- Departed

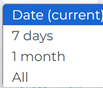
Date Filter
Use the Date dropdown to filter by a specific time frame.
Registration Process
To register a guest on arrival
1. Click the (Pre)Registration button 
2. Complete and submit the registration form.
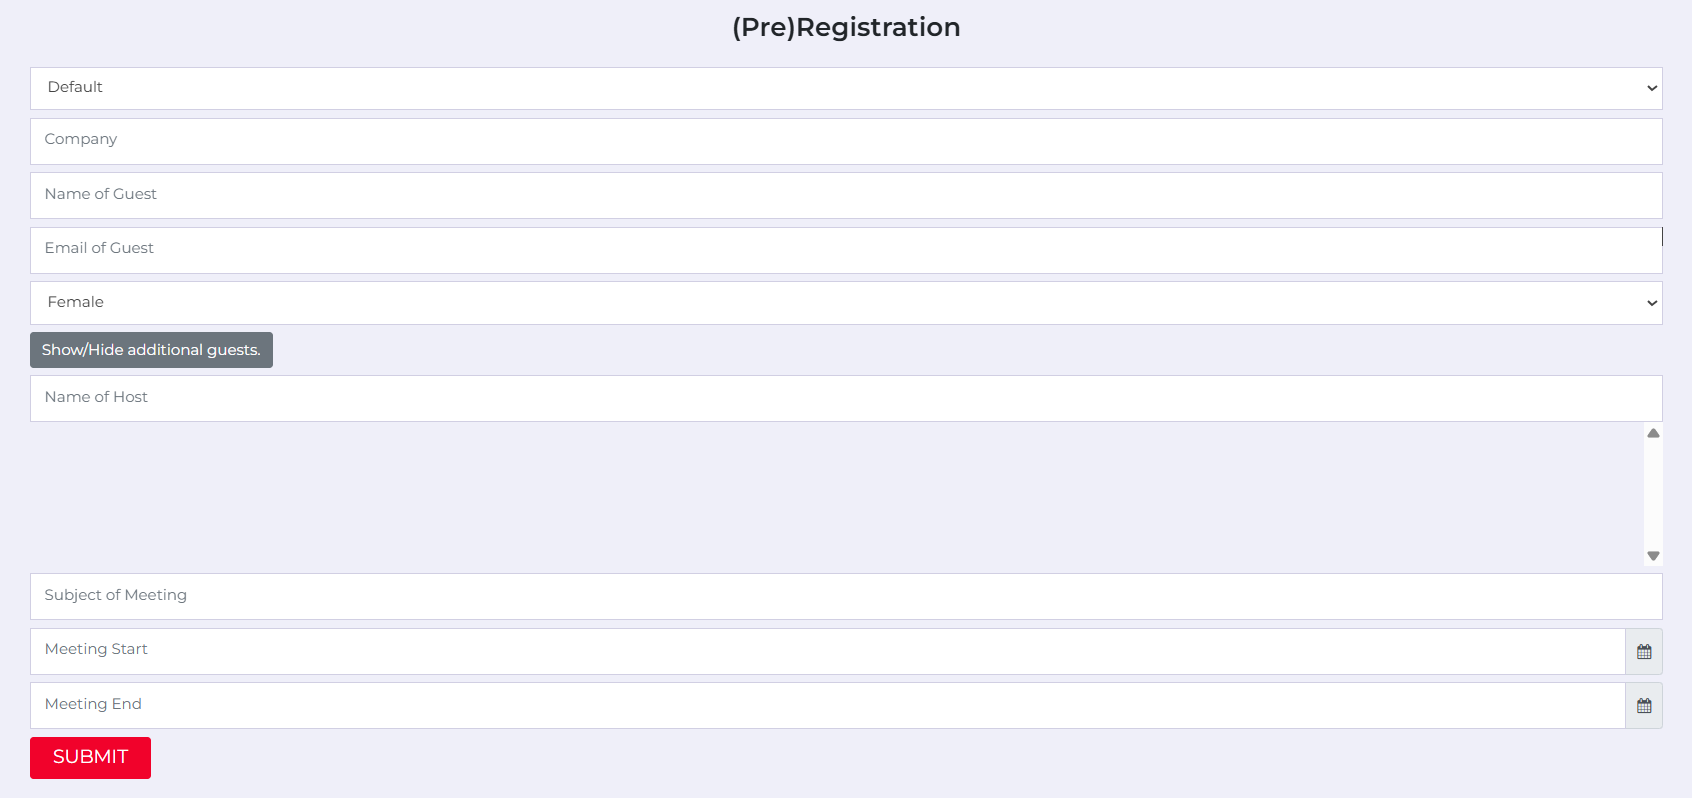
Note: When entering the host's name, start typing and select the correct name from the dropdown list.
Pre-Registration and Registration
As a Dashboard user, you have the ability to Register or to Pre-Register the Guest. It depends on your desired Reception process. At time of your order, you will need to specify your requirements.
Pre-Registering the Guest. When a Guest arrives but is neither registered nor pre-registered yet, you have the ability to Pre-Register the Guest by completing/submitting the sign-up described above. As a result - in the Status column - the Guest will be shown as follows :
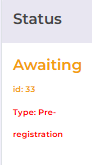
The Guest receives a pre-registration email with QR or PIN code (to speed up the check-in process). Subsequently the Guest should Register him/herself at the Reception Kiosk.
Registering the Guest. If you choose to do so, the Dashboard user will have the ability to Register the Guest, upon arrival, on-the-fly. In this case, the Guest will not receive an email with QR or PIN code and the Guest will not be required to register him/herself at the kiosk. To Register the Guest on-the-fly, the same registration form (see above) is used.
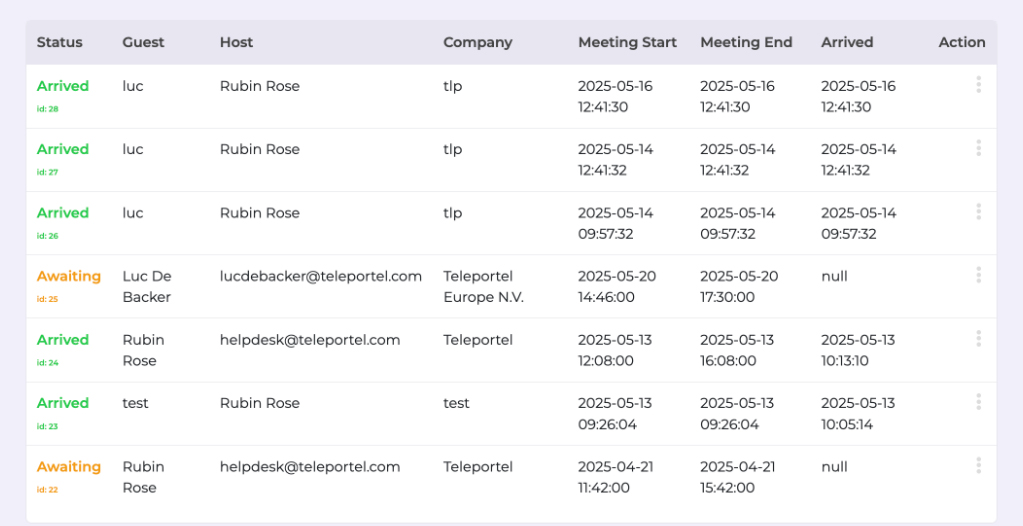
Viewing Current Status
Click the Command Button to view the current guest ledger.
In real-time, the ledger displays both:
- REGISTRATION (walk-in, registered via kiosk)
- PRE-REGISTRATION (registered before arrival)
In the first column (Status) will be an indication of the guest was registered on-the-fly (upon arrival) or was pre-registered (prior to the arrival)
Badge Printing & Record Management
Click the three dots under the Action column to:
• Print a badge
• Delete a record

Badge Details
For pre-registered guests, the badge includes a QR and PIN code.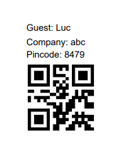
For on-the-spot registrations, these codes are not generated.
Report
Click the Download button to export the current view in .csv format.
You can import this file into a spreadsheet application to create custom reports.
Logout

Remember to log out at the end of your shift.
Need Help?
For support, contact helpdesk@teleportel.com